Getting Started With Django
By Raju Kumar
This article will introduce you to the Python-based Web Development framework called Django Framework. A Web framework on the other hand provides tools and libraries to ease the process of developing web applications. If you landed on this page, it’s safe to assume you are familiar with the Python programming language or the paradigms of programming itself.
So let’s get started.
What is Django?
Django is an open-source web framework built entirely on Python and follows the Model View Controller(MVC) pattern, which we refer to as Model View Template(MVT) in Django framework where the View performs the role of controller and the Templates are the UI components (i.e., Templates relates to the View of the MVC architecture).
It follows the principle of “Don’t Repeat Yourself“. As the quote states, keeping your code simple and nonrepeating. This quote becomes more relevant once we are at the deeper end of understanding Django further in the article.
Best-suited Backend Development courses for you
Learn Backend Development with these high-rated online courses
Why use Django?
There are many great & unique features that make Django one of its kind web framework. A couple of them are listed below:
- Object Relational Mapper (ORM): The ORM in Django defines your data models entirely in Python. That means no more using SQL expressions to work with your database. For instance, it supports multicolumn keys, SQL functions, custom lookups, management schemas, etc.
- Highly Integrated Components: Django comes up with a set of tightly integrated components that reduces a lot of mandatory manual work required to build web applications like authentications and permissions, cookie-based sessions, etc. These components come inbuilt and are built by the Django team themselves.
- Inbuilt Admin Interface: Django provides a production-ready administrative interface to manage the contents of the Web application.
- Secure & Scalable: Django makes the developer’s life easier by taking its security into its own hands, meaning, it can protect itself from common security mistakes like SQL injections, cross-site scripting, cross-site request forgery, and clickjacking. In addition to that, it can scale to meet the demands of the traffic without any hassle.
- Multi-Lingual & multi-regional Support: Django offers full support for translating the text into different languages and working in conjecture with different time zones.
- Great Documentation: It may seem too far-stretched for the docs to be one of Django’s key features, but it’s not. Django has the most well-designed documentation in comparison to its relevant contemporaries in the market.
- Development Features: It comes built-in with a nice templating language, a test server, and security features like CSRF.
Who Uses Django?
Django is very versatile, to say the least. It can be used to develop all kinds of applications from single-page applications to content management systems to applications for scientific computing etc. And if you are into name drooping take a look at the below list of companies that uses Django on large scale:
- Mozilla Firefox
- Disqus
- The Washington Time
How Does Django Work?
As discussed above, Django is based on the MVT (Model View Template) architecture. It is one of the most widely adopted design patterns for developing web applications.
Let’s discuss each of its components in detail.
- Models: Models are just the interface between the database and the web application. It acts as the object representation of data in the database. Django uses these models to create and manage database tables and its elements.
- View: Views are python functions (methods) responsible for handling the request and providing a response from the database to the user.
- Template: A template in Django is the User Interface often created with HTML, CSS, and JavaScript that helps users to interact with the web application.
These components sync together to support the entire web application.
File Structure in Django Web Application
When you start a Django project the following file structure is generated:
Here,
- The __init__.py file helps python treat the directories as packages. These further prevent directories that have a common name, from unintentionally hiding modules that occur later on the module search path. It is usually an empty file.
- The settings.py file holds the information regarding all the configurations and setting of the web application like middleware, database, and network sockets, etc.
- The urls.py file as the name suggests has all the URLs and function calls of the project.
- The wsgi.py file is used for the deployment of the web application. It’s the entry point of servers to the web application.
How to Install Django?
Before installing Django on your system make sure you have the Python installed. To check if you have Python installed use the following command in the terminal:
| python |
If an interactive shell as shown below open up, this means python is already installed in your system:
You can exit this interactive shell using Ctrl+z.
Now, that we have established that Python is installed in your system, it’s standard practice to keep your project organized. For this, we should create a directory (folder) for our test project and for the sake of example call the folder django-test.
Use the below command to create the django-test folder (in Mac/Linux, commands may vary depending upon your system):
| mkdir django-test |
Now change into the directory that you just created using the below command:
| cd django-test |
Setting Up Virtual Environment
Now Setting up a virtual environment is a good practice as it helps to run several versions of Python and with associative property django itself on your machine.
To set up a virtual environment inside the django_test directory we can use the PIP package manager to install the virtual environment using the below command:
| pip install virtualenv |
Now, that you have installed the virtual environment, to create one, make use of the below command (For Windows):
| py -m venv test_env |
Mac or Linux users can use the below command for the same:
| python3 -m venv test_env |
Here we are calling our virtual environment as tese_env, but you can give it the name of your choice.
Now let’s activate the test_env so that we can install django within the virtual environment using the below command:
| cd /test_env/Scripts activate |
For Linux and Mac use the below command to activate your virtual environment:
| source test_env/bin/activate |
Installing Django
Now comes the turn to install django itself. To install django on your system use the below command:
| pip install django |
You will get a confirmation message in the terminal once the installation is completed.
Congratulations, at this point you have successfully installed Django on your system.
How to Start a Project in Django?
Now that we have Django up and running, we can start by creating our first project. For the sake of simplicity, we will call our project django_test_project. To create a project, use the below command:
| django-admin startproject django_test_project |
Now navigate to the project directory that we just created using the below command:
| cd.. cd.. cd django_test_project |
Now it’s time to run the production server to verify if our app is running as expected using the below command:
| python manage.py runserver |
Linux /Mac users can use the below command instead:
| python3 manage.py runserver |
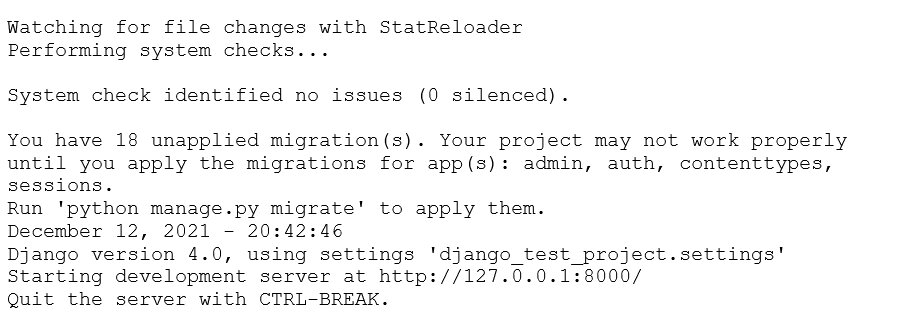
This should activate our test server inbuilt in Django. You will get a similar message as shown below once the server is live:
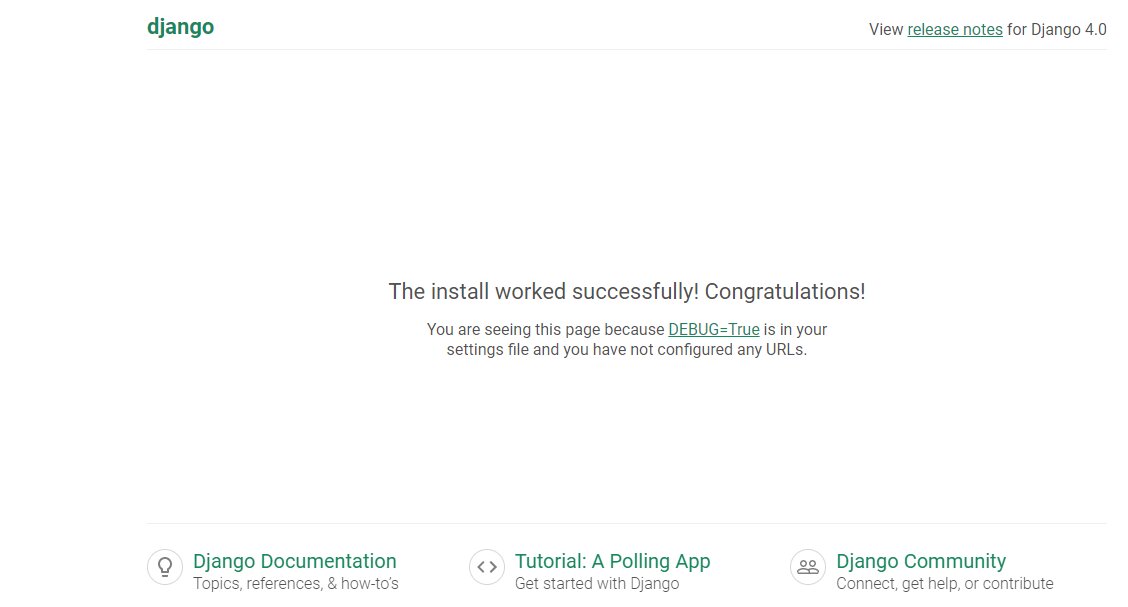
You can open up your browser and navigate to http://127.0.0.1:8000/ url and it will land us on the default server Page as shown below:
Conclusion
At this point we have covered the following concepts:
- Django Framework and its features
- Big players that rely on Django
- Architecture of Django
- File Structure of Django
- Installing Django on your system
- Running Django web server
About the Author:
Raju Kumar is a software engineer with a bachelor’s degree in Computer Science. He has experience in developing technical content for students and professionals in the software industry, primarily for interview preparation.
This is a collection of insightful articles from domain experts in the fields of Cloud Computing, DevOps, AWS, Data Science, Machine Learning, AI, and Natural Language Processing. The range of topics caters to upski... Read Full Bio


