Image-to-text generation with BLIP-2
In this article we will learn about Image-to-text generation with BLIP-2. You will also learn the Architecture of Blip 2 and Python Code to Convert an Image to Text.
Optical character recognition (OCR), often known as an image-to-text conversion, is a process that converts text-containing images into machine-encoded text. In the modern digital era, when photographs are the main information source for many applications, OCR is an essential tool. One of the most recent OCR innovations, Blip 2, has completely changed how images are converted into text. We will go into the inner workings of Blip 2 technology and examine the idea of OCR in this post.In this article we will lean about Image-to-text generation with BLIP-2.
Table of contents
Best-suited Generative AI courses for you
Learn Generative AI with these high-rated online courses
What is OCR?
OCR is a technology that transforms printed or handwritten text into a machine-readable format to be electronically processed, indexed and searched. OCR has a wide range of applications in sectors including banking, healthcare, government, and retail, where the capacity to extract and analyze data from documents and images is essential. The OCR (Optical Character Recognition) engine Blip 2 uses deep learning to extract text from photos.
The versatility of Blip 2 in handling various sorts of photos and text is one of its main benefits. Text in many languages, including English, Chinese, Japanese, Korean, and more, can be recognized. Additionally, it can handle photographs with various scales and orientations and images with noisy or low-contrast backgrounds.


Summary of OCR
The earliest OCR systems used light sensors to identify individual characters on printed papers, and the technology has been around since the 1950s. OCR technology has advanced through the years to accommodate a variety of languages and character sets, including handwritten writing. Preprocessing images, text recognition, and postprocessing are the three steps commonly comprising the OCR process.
Preprocessing entails adjusting the input image’s brightness, contrast, and orientation while removing noise. To recognize characters and their locations, text recognition entails examining the preprocessed image. In postprocessing, the output text is improved by fixing typos and formatting it to match the layout of the original content.
OCR technology can be used for various tasks, including digitizing printed documents, processing invoicing, extracting data from forms, and assisting people with visual impairments to read text.
Beginning of Blip 2
Facebook AI Research created the deep learning-based OCR tool Blip 2. (FAIR). Modern deep-learning techniques are used in Blip 2 to increase the accuracy of text recognition, building on the success of Blip 1. For OCR research and development, Blip 2 is an open-source software framework that offers an adaptable and modular platform.
The Architecture of Blip 2
The design of Blip 2 is made up of four primary parts: a beam search decoder, a connectionist temporal classification (CTC) loss function, a recurrent neural network (RNN), and a convolutional neural network (CNN) for extracting visual features.
The CNN part of Blip 2 takes an input image and generates several feature maps that identify the key elements in the image. These feature maps are fed into the RNN component, which creates a series of probability distributions for the output character set. The difference between the predicted and actual character sequences is calculated using the CTC loss function. Based on a predetermined set of rules, the beam search decoder chooses the most likely sequence of characters from the output probability distributions.
A Step-by-Step Guide for Using BLIP2 and Python Code to Convert an Image to Text
The optical character recognition (OCR) method turns text-filled photographs into editable text files. OCR can be used for various tasks, including automatic data entry, translation, and digitizing printed materials. This article will teach you how to convert an image to text in Python using the free and open-source OCR engine BLIP2.
Make sure you have the necessary software installed before we start:
- Python 3.6 or higher
- Pillow
- BLIP2
- NumPy
Step 1 of Pillow BLIP2 NumPy: Install the Required Libraries
Installing the required libraries is mandatory before we can proceed. In this lesson, we’ll use the following libraries:
Pillow: This library opens, manipulates, and saves images.
BLIP2: This is the OCR engine we will use to convert the image to text.
NumPy: This library is used for numerical computing.
You can install these libraries using pip by running the following command:
Python code:
pip install pillow blip2 numpy
Step 2: Loading the Image
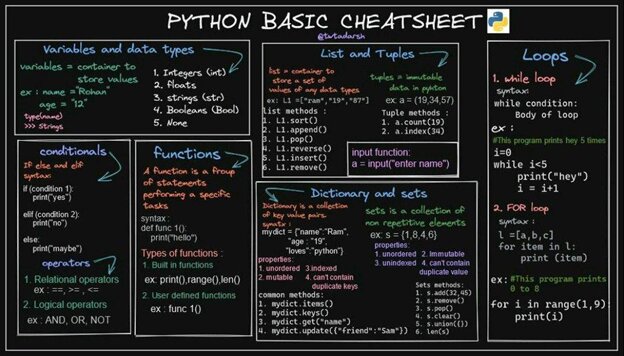
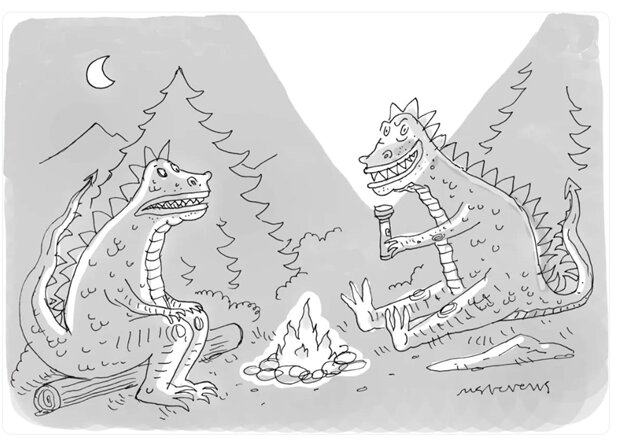
The below-given images are used for the input
The image we wish to convert to text will be loaded at this stage. Any image with text can be used, including screenshots, photos, and scanned documents. We can make use of Pillow’s Image module to load the image.
Python code:
from PIL import Image
image_path = "path/to/image.jpg"image = Image.open(image_path)
In the code above, replace “path/to/image.jpg” with the path to the image you want to convert.
Step 3: Preprocessing the Image
The image needs to be preprocessed to improve the text before OCR can be performed on it. Preprocessing methods are used to enhance the image’s quality and increase the OCR engine’s ability to read the text. We’ll use several preprocessing methods on the image in this stage.
Python code:
import numpy as np
# Convert the image to grayscalegray = image.convert('L')
# Convert the image to a NumPy arrayimg_array = np.array(gray)
# Invert the imageimg_array = 255 - img_array
# Threshold the imagethreshold = 100img_array[img_array < threshold] = 0img_array[img_array >= threshold] = 255
# Convert the NumPy array back to an image
The code above performs the following operations:
- Convert the image to grayscale
- Convert the image to a NumPy array
- Invert the image
- Threshold the image
- Convert the NumPy array back to an image
The convert() function of the Image class is used in the first line of code to convert the image to grayscale. This is done because processing an image in grayscale is simpler than processing an image in colour.
Next, we use the NumPy library’s array() method to transform the grayscale image into a NumPy array.
By deducting each pixel value from 255, we flip the image. This is done because, in most images, the text is darker than the backdrop; yet, when the image is inverted, the text is made brighter than the background.
The image is then thresholded by assigning pixel values to 0 for any values below a particular threshold and 255 for any values above the threshold. This is done to make the text more visible to the OCR engine.
Finally, we use the fromarray() method of the Image class to transform the NumPy array back into an image.


Step 4: Running BLIP2 OCR
After preprocessing, we can now use BLIP2 to do OCR on the image. Wide-ranging languages and fonts can be recognized using the OCR engine BLIP2. Installing the blipocr package is required to utilize BLIP2 in Python.
Python code:
!pip install blipocr
After installing the package, we can use the blipocr module to perform OCR on the preprocessed image.
Python code:
from blipocr import BlipOcr
# Initialize the OCR engineocr_engine = BlipOcr()
# Perform OCR on the imagetext = ocr_engine.ocr_image(processed_image)
The BlipOcr class from the blipocr module is first imported in the code above. After that, we build a class instance and save it in the ocr_engine variable.
Finally, we invoke the BlipOcr class’ ocr_image() method, passing the preprocessed image as an input. The text that we keep in the text variable is the text that the method returns that has been read by the OCR engine.
Step 5: Postprocessing the Text
The OCR engine’s output may include typographical, character, or formatting mistakes. We must use postprocessing procedures to increase the text’s correctness. We’ll post process the text using several fundamental methods in this stage.
Python code:
import re
# Remove non-alphanumeric characterstext = re.sub(r'W+', ' ', text)
# Remove leading and trailing whitespacetext = text.strip()
The re module is employed in the code above to eliminate non-alphanumeric characters. To do this, we invoke the sub() method while giving a regular expression that matches all characters other than alphanumeric. These characters are swapped out for a single space.
The strip() method is then used to eliminate any leading and trailing whitespace from the text.
Step 6: File the Text Saving
The recognized text can now be saved to a file. We can use Python’s file I/O operations to write the content to a file to accomplish this.
Python code:
output_file = "path/to/output.txt"
with open(output_file, "w") as f: f.write(text)
Change “path/to/output.txt” in the code above to the path and filename you wish to store the text to. Using the open() function, we open the file in write mode, passing the file path and mode as arguments.
The file object’s write() method is then used to write the text to the file. Finally, we use the close() method to close the file.
The below-given images are the output of the input images.
This is the output of the first image.
Conclusion
Converting images to text using OCR (Optical Character Recognition) can be a valuable tool in various applications, such as digitizing printed documents, extracting text from images for analysis or translation, and automating data entry processes. Python provides several libraries for image processing and OCR, and in this article, we have explored how to use the open-source OCR engine BLIP2 to convert an image to text.
Author-Vishwa Kiran
This is a collection of insightful articles from domain experts in the fields of Cloud Computing, DevOps, AWS, Data Science, Machine Learning, AI, and Natural Language Processing. The range of topics caters to upski... Read Full Bio


