Views in Django Using Python
Views in Django are responsible for presenting data to the users for consumption and viewing. Views are an integral part of the MVT architecture of Django.
Views are basically Python functions that take in an HTTP request as a parameter and return an appropriate response for the same. The views in Django hold the logic behind the entire request and response cycle of web applications. These responses can be any of the following:
- A simple HTTP response
- An HTML template
- An HTTP redirection response(Redirecting requestor to another web page)
- A 404 Error
- Any type of media files(images, videos, etc).
Note: If you are familiar with other web development frameworks based on the MVC(Model-View-Controller), it’s important to not get confused between views in the MVC paradigm and Django views. Django views roughly correspond to controllers in MVC, and Django templates to views in MVC.
Now let’s skip to the good part.
How to Create Views in Django?
Before you start with views, make sure you have Django installed on your system. For the sake of example consider we have created a Django project named sample_project. Now to create an app inside the project use the below command:
python manage.py startapp sample_app
We have named our app sample_app. At this point our project directory would look like below:
Now we need to tell Django that we have created a new app(ie, sample_app) inside our project. This is done by specifying the app in the INSTALLED_APPS list inside the settings.py: file as shown below:
INSTALLED_APPS = [
    'django.contrib.admin',
    'django.contrib.auth',
    'django.contrib.contenttypes',
    'django.contrib.sessions',
    'django.contrib.messages',
    'django.contrib.staticfiles',
    'sample_app',
]
Now, to render the sample_app using URLs we need to include the app in our main project’s urls.py file so that URLs redirected to that app can be rendered.n So open up the sample_project/urls.py file and add the following header to it:
from django.urls import include
As you can see inside the urls.py file a list of URL patterns. Here you need to specify the app name for including your app URLs as shown below:
urlpatterns = [

path('admin/', admin.site.urls),

path('', include("sample_app.urls")),

]
At this point our urls.py file has the following code:
from django.contrib import admin
from django.urls import path
from django.urls import include

urlpatterns = [
    path('admin/', admin.site.urls),
    path('', include("sample_app.urls")),

]
Now we can use the default MVT model to create URLs, views, models, forms, etc. in our sample_app and they will be automatically included in our main project.
Creating the View:
Now let’s create a view that returns the current date and time as a response whenever a request is made to the view as shown below:
# import Http Response from django
from django.http import HttpResponse

# import datetime module
import datetime

# create a function
def sample_view(request):
        # fetch date and time
        now = datetime.datetime.now()
        # convert the value in now variable
        # to string
        response = "Time is {}".format(now)
        # return response
        return HttpResponse(response)
Now, let’s look into the above code in detail:
- Initially, we have imported the HttpResponse class from the http module, which handles the request and response cycle of Django. Then we have also imported the DateTime library to fetch the current date and time.
- Then we created a python function called sample_view that takes a single parameter(ie, request). It’s called the view function. Note that every view function takes an HttpRequest object as its first parameter, which is generally named request.
- The sample_view function returns an HttpResponse object that holds the response from the server. Each view function returns an HttpResponse
Now we need to map our view to the URLs of the app. So create a new file named urls.py inside the sample_app directory as shown below:
# sample_app/urls.py file

from django.urls import path

# importing views from views..py
from .views import sample_view

urlpatterns = [
        path('', sample_view),
]
Now run the development server using the below command:
python manage.py runserver
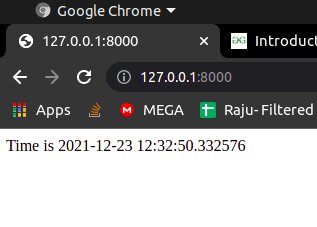
Now, if we visit this URL: http://127.0.0.1:8000/, we can see our view in action as shown below:
Best-suited Backend Development courses for you
Learn Backend Development with these high-rated online courses
Conclusion
So far in this article, we have learned the following concepts:
- What are Views?
- Working of Views
- Creating Views
- Mapping views to URLs
Explore More:
- Top Django Interview Questions and Answers
- Why Learn Python? Reasons and Top Resources to Learn Python
If you have recently completed a professional course/certification, click here to submit a review.
This is a collection of insightful articles from domain experts in the fields of Cloud Computing, DevOps, AWS, Data Science, Machine Learning, AI, and Natural Language Processing. The range of topics caters to upski... Read Full Bio


