How to Use the Quick Access Toolbar in Excel?
The Quick Access Toolbar is a customizable feature in Microsoft Excel that can help streamline workflow. It provides a convenient location for your most frequently used commands, allowing you to access them quickly and efficiently with just a single click. In this blog, we will learn more about the Quick Access Toolbar.
What is the Quick Access Toolbar?
The Quick Access Toolbar is a versatile feature in Excel that allows you to quickly access the tools you use most frequently. It allows you to place frequently used commands for easy, one-click access. The Quick Access Toolbar is located above the Ribbon in the upper left corner of the window.
Best-suited MS Excel courses for you
Learn MS Excel with these high-rated online courses
Default Commands in Quick Access Toolbar
The default commands of the Quick Access Toolbar typically include:
- Save: If you have created a new blank workbook, the Save As screen will be displayed the first time you press the Save button. Here, you can choose the location to save your workbook. Once the workbook has been saved, pressing the Save button will automatically save any new changes.
- Undo: The Undo command undoes the last action performed on the sheet. Click the small arrow next to the button to see a list of recent actions that can be undone, and select the one that you want to undo.
- Redo: If you have undone an action by mistake and want to execute it again, you can use the Redo command. This command re-applies the action that was previously undone. With the help of an arrow located next to the button, you can choose a specific action from a list to redo.
Explore MS Excel Courses
Quick Access Toolbar Position
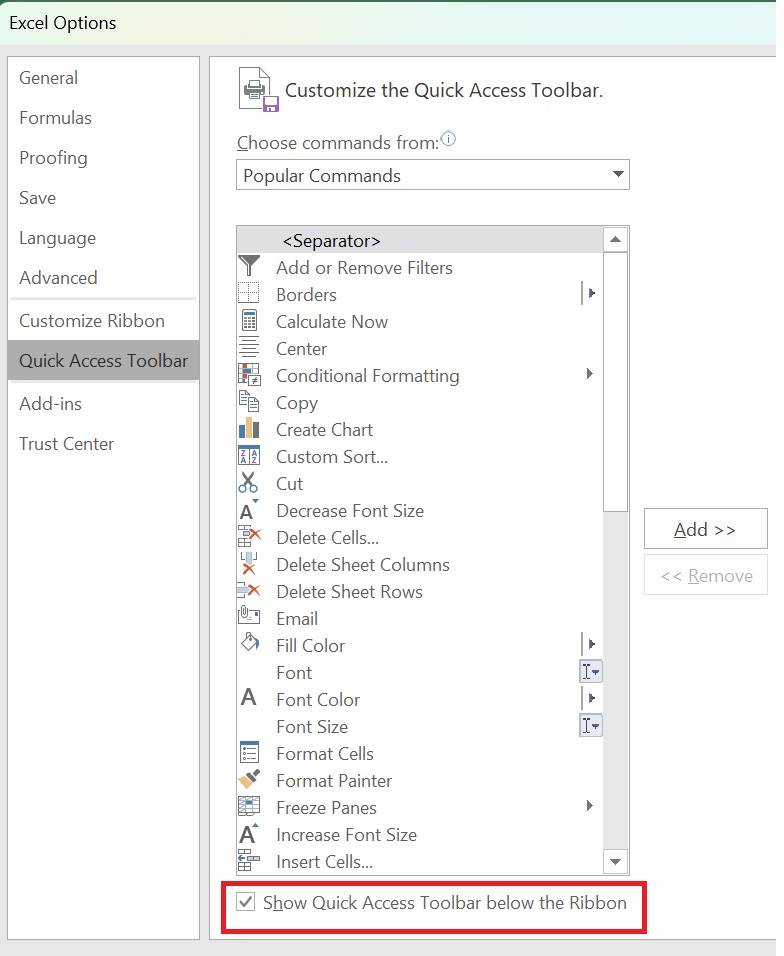
By default, the Quick Access Toolbar is displayed above the Ribbon. However, you can change its position and place it below the Ribbon. You can do this in two ways:
Excel Options Dialogue Box
- Open the Excel Options dialogue box.
- Find the selection box to change the toolbar position.
Menu on the Bar
- Go to the far right of the Quick Access Toolbar.
- Click the arrow pointing downwards.
- Select “Show Below the Ribbon” from the menu.
- Both methods allow you to customise the toolbar's position according to your preference.
Why Customize The Quick Access Toolbar?
Customising the Quick Access Toolbar is crucial to optimising your Excel workflow for several reasons:
- Efficiency: By placing your most used tools on the quick access bar, you can access them with a single click, saving time and effort.
- Customisation: Allows you to adapt Excel to your specific needs and work style, eliminating the need to search for commands in different ribbon tabs.
- Productivity: By having quick access to the tools you need, you can complete your tasks more efficiently and increase your overall productivity.
Customising the Quick Access Toolbar
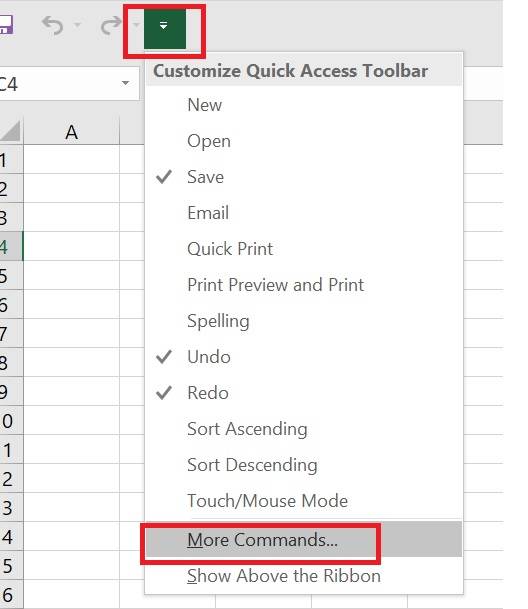
The great strength of this bar is its configurability. You can easily add or remove any of these commands with a single click. If you want to search for more commands than those shown in the default list, click More Commands. A dialogue box will appear, providing additional customisation options.
You can easily add the commands you want for quick access, avoiding the need to search through ribbon tabs. Additionally, some commands are not available on the Ribbon, and this bar allows you to incorporate them into your main window.
Here are several ways to configure the bar:
Method 1
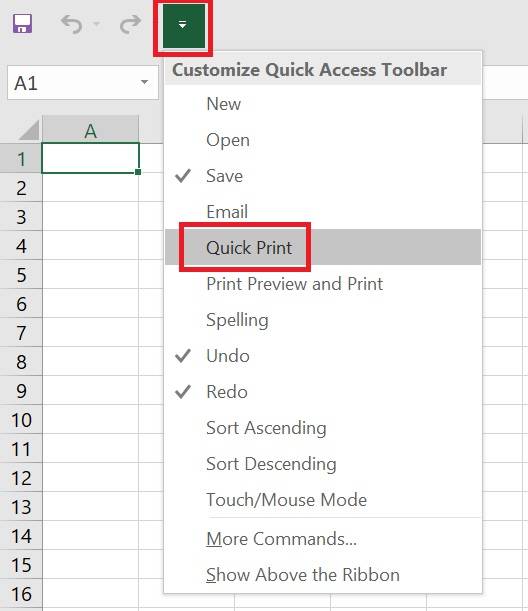
- Press the arrow at the far left of the bar, pointing downwards.
- Choose from the options, such as "Quick Print."
- For example, you can add "Quick Print" and see the printer icon on the bar.
Method 2
- Press the same arrow and select "More Commands."
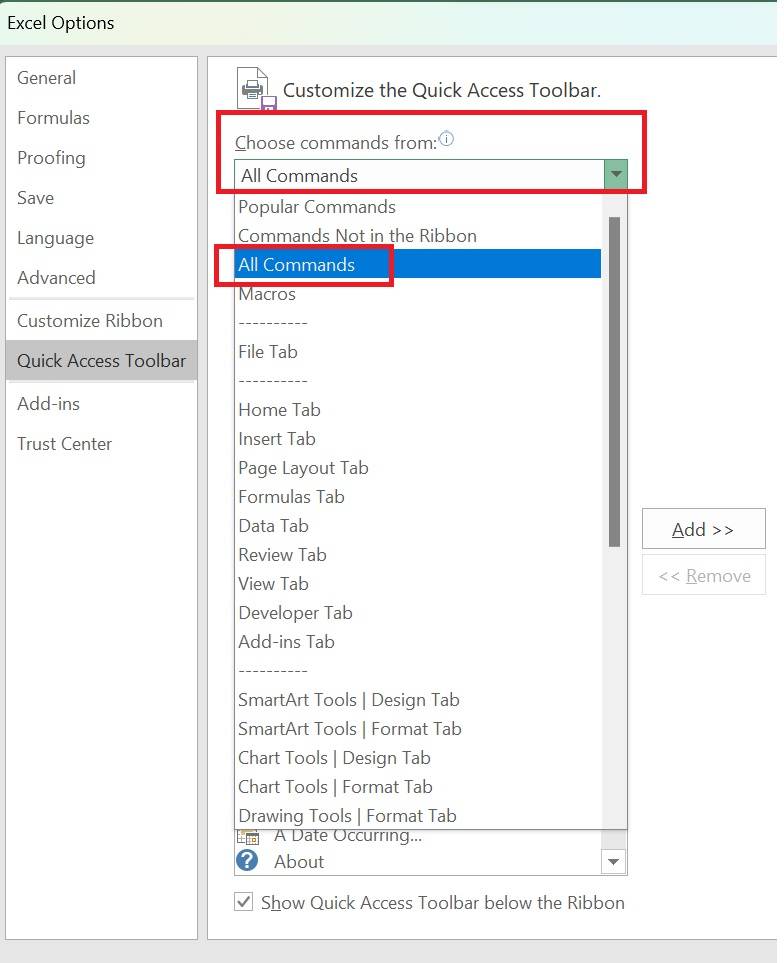
- A new window will open.
- To see all possible commands, select "All Commands" in this window.
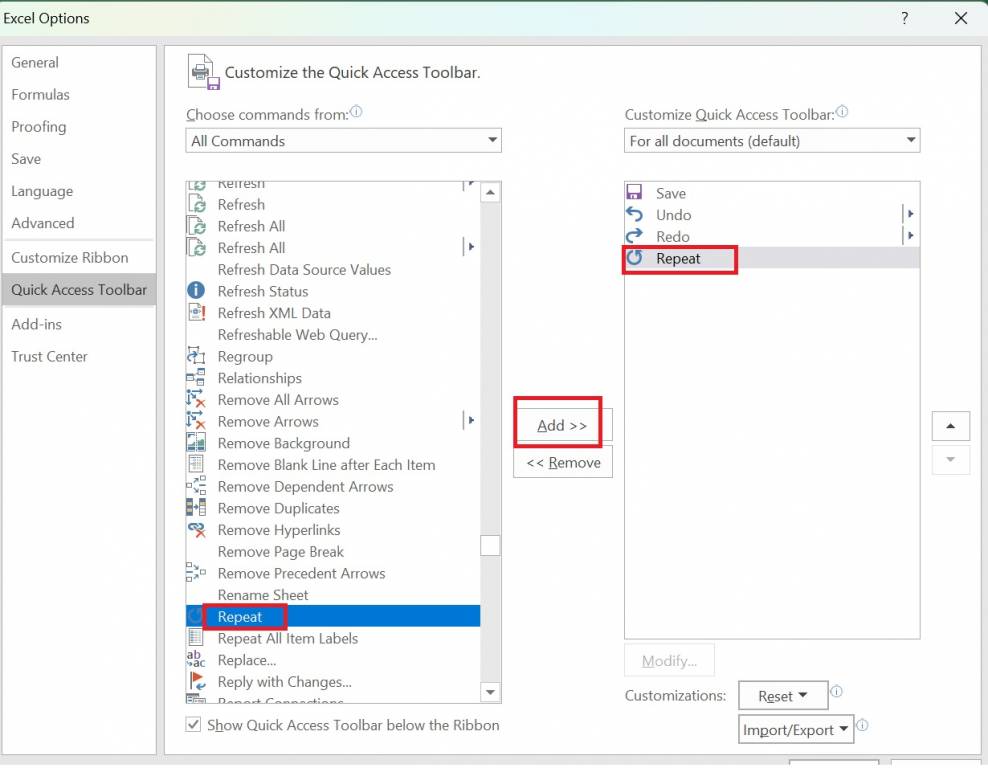
- Find and add the desired command by pressing the "Add" button.
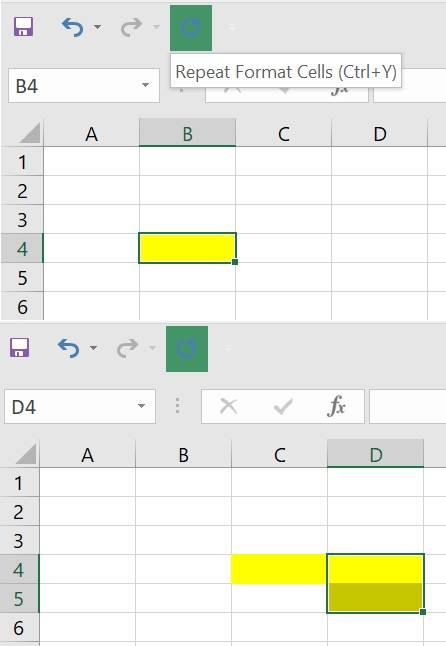
- For example, the "Repeat" command repeats the last action performed. If you fill a cell with yellow, selecting another cell and clicking the icon will repeat the action.
Method 3
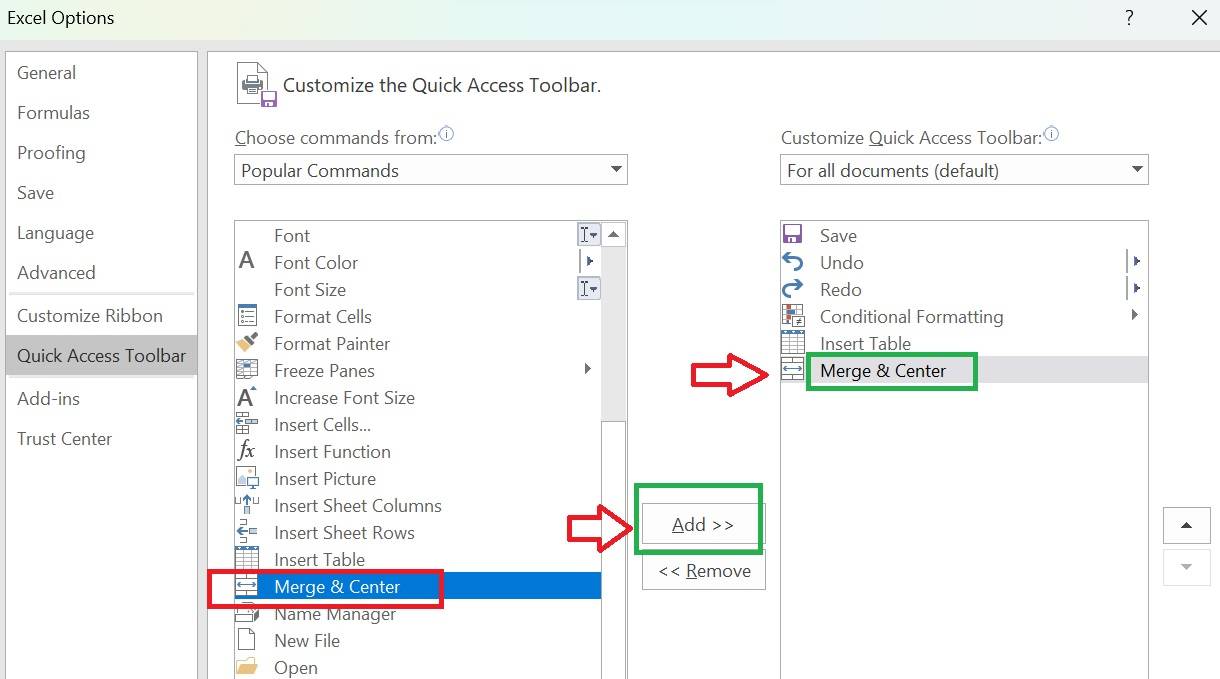
- Right-click on a ribbon icon.
- Choose "Customize Quick Access Toolbar."
- For example, right-click the "Merge & Center" command and add it.
- This method is useful for frequently used commands, saving time searching through the Ribbon.
- If you prefer the bar below the Ribbon, choose the "Show below the ribbon" option from the same menu as the first method.
By following these methods, you can customise your bar to include the commands you need, making them easily accessible.
Explore these online degree programmes–
| Online MBA Programmes | Online BTech Programmes |
| Online MSc Programmes | Online MTech Programmes |
Adding Commands to the Quick Access Toolbar
You can add additional commands to the Quick Access Toolbar by clicking on the drop-down menu at the far right of the bar. This will display a list of commands that you can add:
Note that the Save, Undo, and Redo commands have check marks next to their names, indicating they are currently displayed on the Quick Access Toolbar. You can add any of the following nine additional commands by selecting them:
- New: Open a new workbook.
- Open: Displays the Open panel to open an existing workbook.
- Send by Email: Opens the default email client on your computer to send the open workbook.
- Quick Print: Sends the current workbook to your computer's default printer.
- Print Preview and Print: This opens the Print panel, which shows a preview of the workbook and options to print it.
- Spelling: Check the text in the current workbook for spelling errors.
- Sort Ascending: Sorts the selected cells or columns in ascending order.
- Mouse/Touch Mode: Switches between mouse and touch modes, making command buttons on the Ribbon larger for easier use on touch screens.
Conclusion
Customizing the Quick Access Toolbar in Excel increases your efficiency and productivity while working with spreadsheets. By adding your most used commands and tailoring the bar to your specific needs, you can optimize your workflow and complete tasks faster and more efficiently. Experiment with different settings and see how customization can improve your Excel experience!

Rashmi is a postgraduate in Biotechnology with a flair for research-oriented work and has an experience of over 13 years in content creation and social media handling. She has a diversified writing portfolio and aim... Read Full Bio


