Mastering Button Tag in HTML
Have you ever wondered how interactive buttons on websites are created? They're often made using the HTML <button> tag, which allows developers to add clickable elements for various actions like submitting forms, executing scripts, or controlling page behaviour. Let's understand more!


Best-suited Web Development courses for you
Learn Web Development with these high-rated online courses
What is a Button Tag in HTML?
The <button> tag in HTML is used to create a clickable button within a web page. This tag is versatile and can be used for various purposes, such as submitting forms, handling user interactions, or triggering JavaScript functions. Buttons can be used for navigation purposes, like moving to the next step in a process or opening a modal window. These are integral in controlling various UI elements like toggles, dropdowns, tabs, and accordions.
Syntax of Button Tag in HTML
In the syntax above,
1. type (optional): This attribute specifies the button's behaviour and can be one of the following
- submit: The default value if the type attribute is not specified. It submits the form data to a server. This is used within a <form> element.
- reset: Resets all the form's fields to their initial values.
- button: A regular button with no default behaviour. It's typically used to execute JavaScript code when the button is clicked.
2. Button Text: This is the label displayed on the button. It can be plain text or include HTML (like images or formatting tags).
Usage of HTML Button Tag with Examples
Example 1: Submit a Form
Problem Statement: Create a button to submit a form containing a text input field.
<!DOCTYPE html><html><head> <title>Form Submission</title></head><body>
<form action="submit-endpoint"> <input type="text" name="inputField" placeholder="Enter Text"> <button type="submit">Submit</button></form>
</body></html>
Output
Example 2: Reset a Form
Problem Statement: Implement a button to reset the fields of a form to their default values.
<!DOCTYPE html><html><head> <title>Form Reset</title></head><body>
<form> <input type="text" name="inputField" placeholder="Enter Text"> <button type="reset">Reset</button></form>
</body></html>
Output
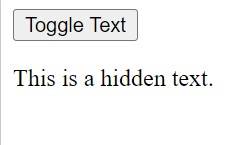
Example 3: Toggle Content Visibility
Problem Statement: Use a button to toggle the visibility of a text paragraph.
<!DOCTYPE html><html><head> <title>Toggle Visibility</title></head><body>
<button type="button" onclick="toggleVisibility()">Toggle Text</button><p id="textParagraph" style="display: none;">This is a hidden text.</p>
<script> function toggleVisibility() { var paragraph = document.getElementById('textParagraph'); paragraph.style.display = paragraph.style.display === 'none' ? 'block' : 'none'; }</script>
</body></html>
Example 4: Change Button Text on Click
Problem Statement: Change the text of a button each time it is clicked.
<!DOCTYPE html><html><head> <title>Dynamic Button Text</title></head><body>
<button type="button" id="dynamicButton" onclick="changeText()">Click Me</button>
<script> function changeText() { var button = document.getElementById('dynamicButton'); button[removed] = button[removed] === 'Click Me' ? 'Clicked!' : 'Click Me'; }</script>
</body></html>
Output


Key Takeaways
- The <button> tag in HTML is a versatile element used to create clickable buttons on web pages.
- It can perform various actions like submitting forms, triggering JavaScript functions, or resetting form fields, depending on the specified type attribute (submit, reset, or button).
- Buttons can be easily styled with CSS for a customized appearance and are essential for interactive and user-friendly web design.
- Additionally, ensuring accessibility in button design is crucial for a wide range of users, including those using assistive technologies.
FAQs
What is a button tag?
The button tag in HTML is used to create a clickable button, which can be used for submitting forms, handling user interactions, or triggering JavaScript events.
How do you add text to a button?
To add text to a button, you simply place the desired text between the opening and closing button tags.
Can a button tag be used for submitting a form?
Yes, a button tag can be used for submitting forms. By default, when placed inside a form, a button will submit the form unless the type attribute is set to a different value like "button" or "reset".
How do you make a button tag perform a specific action?
To make a button perform a specific action, you can use JavaScript. By adding an event listener to the button, such as an onclick event, you can define a JavaScript function that runs when the button is clicked.
Is it possible to style a button tag with CSS?
Yes, button tags can be styled using CSS. You can apply styles like color, background, borders, padding, and more to customize the appearance of your button.


